
The holidays. A dichotomous time where I find myself both thrilled and excited by all the nostalgia and festivities, but then equally riddled with anxiety from all the messages to buy this, gift that, you need stuff, stuff, stuff. My absolute favourite gifts to both give and receive are ones that are thoughtful, handmade, and from the heart. To know that someone has lovingly spent precious time pouring their creativity into an item means so much to me. This is why this year, my focus is on gifting DIY Skin Care for the holidays.
Maybe you’re a knitter, or a painter, a potter or a baker? Or maybe you’re not much of a DIY person at all, and have no idea where to start! That’s totally ok too. Whether or not we identify as creative, we all have the ability to play with materials, supplies, and ingredients, and make beautiful things.
I know this is true, because I witnessed it just the other day.
In Vancouver, there’s this awesome festival that happens every fall. Vancouverites put on their Blundstones and Gortex and brave the rain to crawl from studio to studio to witness and experience the amazing creations that our local artists lovingly labour over in their unique and quirky studios. What is known as the Eastside Culture Crawl, is an amazing opportunity to be inspired by what is possible when you follow your passions, and let your creativity flow out of you.
If you’ve ever seen something, or tried a product, and thought, “I wonder if I could make something like this?” The answer is yes!
Whether it’s a scarf, or a loaf of bread, or maybe even a lotion, you totally can! It might not turn out exactly like your original inspiration, but therein lies the beauty. When you let the world inspire you, and you try something new for yourself, you get to imprint your own uniqueness onto your creation.
And when you gift this away to someone, the love and part of you that you infused into the item, can be felt by the recipient. That’s something you can not buy.
So this year, I’m giving the gift of my handmade skin care.
*Spoiler alert to my friends and family ;)*
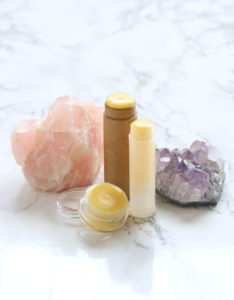
One of the easiest natural products to make is lip balm!
In under an hour, you can easily make 1 dozen, hand crafted, natural lip balms to gift to your closest family and friends.
My favourite lip balm recipe is included in my Skinspired DIY Beauty Basics course, and comes with a step-by-step video to walk you through the whole process. I invite you to check out the course here.
Equipment you’ll need:
- Kitchen Scale the measures grams
- Small pinch bowls for ingredients
- 2 x small heat-resistant glass measuring cups
- Stove or heating element
- Shallow pan with 1-inch of water
- Thermometer
- Silicone spatula
- 12 x 5mL empty lip balm tubes
Ingredients:
- Beeswax pastilles 25% 15g
- Cocoa Butter 30% 18g
- Mango Butter 20% 12g
- Fractionated Coconut Oil (MCT) 16% 10g
- Jojoba Oil 8% 5g
- Essential oils of your choice (see below for suggestions)
How to make these luscious lippies:
- Prepare a water bath in a wide, flat-bottomed pan by bringing 1 inch of water to a bare simmer over low-medium heat.
- Use the kitchen scale to carefully measure out each of the ingredients into their own little pinch bowl or dish. Using a kitchen scale can take some getting used to, but is critical for success when making your own skin care products. Since the ingredients used in DIY skin care have different densities and shapes, it’s hard to give accurate measurements by volume.
- Add the cocoa butter to a small heat-resistant glass measuring cup. Place the measuring cup into the water bath. Melt the butter, and heat them to about 175°F (80°C), and hold at this temperature for 20 minutes to temper the butters. Tempering the butters is totally optional, but I find that this helps prevent any grittiness in the lip balm.
- Meanwhile, add the weighed out beeswax to the second measuring cup. To melt the beeswax, place this measuring cup in the same water bath next to the other measuring cup (or if you don’t have a large shallow pan, you may need two smaller pans for your water baths).
- When the beeswax has melted, pour in the fractionated coconut oil and jojoba oil into the beeswax, and stir to combine with your spatula. Allow the beeswax and oils to continue to heat and hold in the water bath until the butters have finished tempering. This will ensure that all the ingredients are the same temperature before combining.
- Remove both measuring cups from the water bath, and carefully wipe down the outsides of the measuring cups with a dish towel. This is to prevent any water on the sides of the containers from accidentally dripping into the mixture causing your lip balms to spoil. Pour the beeswax and oil mixture into the tempered butters, and stir to combine.
- Continue to stir for a minute or so until the mixture starts to harden along the edges. This is your cue to add your essential oils. (See below for blend suggestions)
- From this point onwards, you’ll want to work fairly swiftly as the beeswax can harden quickly. Using either the spout on your measuring cup, or a pipette dropper, carefully pour the mixture into your empty tubes.TIP: If you’re having difficulty balancing the narrow tubes, then I recommend binding them all together with a hair elastic so that they form a more stable base as you fill them up.
- Before adding the lids, move the lip balms to the fridge to cool completely. Once completely cool, remove the lip balms, add the lids, and label or decorate your lip balms as you wish!
ESSENTIAL OIL BLEND SUGGESTIONS:
Snow Day Blend
- 10 drops peppermint essential oil
- 6 drops cinnamon leaf essential oil
- 4 drops clove bud essential oil
Mistletoe Kisses
- 10 drops orange essential oil
- 8 drops cinnamon leaf essential oil
- 2 drop spruce essential oil
Christmas Morning
- 10 drops (or 4-6 blobs) of benzoin essential oil
- 6 drops of roasted coffee essential oil
- 4 drops of cinnamon essential oil
It’s really that simple! The whole process takes about 30-40 minutes. Also, don’t worry if you don’t have every single kitchen tool, just use what you have on hand. The only non-negotiable is the kitchen scale, as it really does make a world of a difference to your DIY skin care creations.
Making lip balm is really just the tip of the iceberg. If you want to start making even more of your everyday skin care items, I invite you to check out my 8 recipe video course, Skinspired DIY Beauty Basics.

Leave A Comment